
Home Capri Literature Parts ascLiterature ascParts Projects/Misc
Home
Capri Literature
Parts
ascLiterature
ascParts
Projects/Misc
![]() 79-86
Center Console Restoration
79-86
Center Console Restoration ![]()
Please excuse the low quality of some of the pictures. I had to try to use fairly high compression to keep the size of this site under control. Please be helpful and send comments here.
Go to part: 1,2,3,4,5,6,7,8,9,10,11
Part 5: The Incredible Hull vs Wonder Putty!
The console hull was pretty solid. Checking it over throughly
there were some common problems.
The front metal wiring
harness bracket was ripped off. The connectors on the console's
wiring harness go there and make it a total PITA to disconnect them from
the dash wiring harness. So people get mad and just yank at it and
tear the bracket out of the console. In this case the passenger
side mount needed rebuilding.
There was a tab where the clock
mounts that was broken off. Dunno how the previous owner managed
that one.
Then when the pad was removed and the plate that hides
the rear ash tray, the tabs holding the speed clips in place were simply
destroyed.
We can rebuild them...we have the technology.
We need WONDER PUTTY!
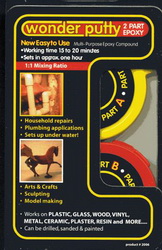
Wonder Putty
is a 2 part epoxy putty that is mouldable with water as it sets.
It gets really sticky and latches on strong to watever you've applied it
too. It dries fairly hard so it's PERFECT for rebuilding the rigid
tabs on the console. And what's great is if you SCREW IT UP, you
just pry it off, sand and DO IT AGAIN!
Wonder Putty is good for
rigid plastic mounts. Other flexible mounts need something else.
Check out the picture below. The top arrow shows the creative
use of a washer to work around the busted clock mount. The red
arrow at the bottom points to the location where the wiring harness
bracket should mount. It's totally MIA. This is the first
one we will tackle.

Console Harness Bracket Mount
Get a bowl of water.
Take two good sized gobs of the Wonder Putty epoxy (Part A and Part B).
Squish them together with your fingers, then squish it into the location
you need it. Dip your fingers in the water and form the shape you
need. Dip the end of the bracket that will mount to this repaired
ares in the water (this keeps it from sticking to the putty). Put
the bracket where it will need to be, make it squish the putty somewhat.
A little bump should come through the hole. This is where you
drill when the putty has hardened.

Below you can see it painted and drilled. Use a drill one size
smaller than needed. The bracket will mount PERFECTLY.

Information Center Broken Tab
The
right side mount for the clock was busted off.

Get some WONDER PUTTY! Mix it together! Form a new
mounting point!
I placed the black information cover in place and
pushed the putty up to it so that the final mount is going to be in the
right spot for the clock.
 |
|
Drill a hole. DONE! (Okay, not done...I did need to
dremel it a little bit more when I put the clock in.)

Console Pad Bracket Mounts
Back in
the day, the console pads made for a great "third seat" up front.
This is some of the damage that happens. The mounting points for
the speed nuts are just detroyed.

Fill it with WONDER PUTTY! Smooth with water and your fingers.

Dremel and drill. Those mounts are SOLID. They will work
very well. In this location, it is critical you don't get the
repair too thick. The repair should be a bit shallow compared to
the top edge of the console.
When done, the speed clips MUST be
able to snap in place. So the holes need to be large enough and
the front end of the tab needs to be dremelled enough to let the speed
clip push far enought to the rear of the console. One trick is to
take the speed clip that goes there and a LARGE screw driver and wedge
the clip open a bit. That way the repair can be a bit thicker.
The original material was very thin. As thin as the rest of the
console.
It takes some finaggling. Testing and retesting.
Go slow and it'll come out fine. Remember. You can always
break it and redo it.

And the final result. Painted with the speed clips in place:

After all of the rebuilding of the tabs, etc we did the old
Duplicolor Adhesion Promoter and Charcoal Paint. For the hull I
used an old can of Metro Finishes paint I had to compare it to the SEM
Charcoal I used on the pad.

Looks GREAT!

In Conclusion:
Wonder Putty is DA
BOMB!
(also, I rule)
'nuff said.
Part 6: Brackets and Bezels! Oh my!
© 2003-2007 Michael Negus All Rights Reserved.
Send Email to:
info@ascmclarencoupe.com
asc McLaren and Fox Bodied Mercury Capri Cars