
Home Capri Literature Parts ascLiterature ascParts Projects/Misc
Home
Capri Literature
Parts
ascLiterature
ascParts
Projects/Misc
![]() 79-86
Center Console Restoration
79-86
Center Console Restoration ![]()
Please excuse the low quality of some of the pictures. I had to try to use fairly high compression to keep the size of this site under control. Please be helpful and send comments here.
Go to part: 1,2,3,4,5,6,7,8,9,10,11
Part 3: Zombie Console Pad
For this
part I manage to kill a console pad and then resurrect it from the dead.
Here is the before picture of the console pad. VERY red
and separating from the sides. Since the bottom frame was painted too
(heavens forbid the original owner taped anything off), I
had a bright idea.

Well, I thought it was a bright idea. See the image below.
THAT is a mistake. A big fat one. The plan was to strip off
the red paint with "Blech Whyte" Tire Cleaner. Bleche White will
loosen paint from plastics without hurting them, which is true. Well, in this
case, it made a BIG FAT MESS. DO NOT DO THIS with a console pad!

When I left it set for a full 2 days, I found that the console pad
had sucked up most of the cleaner. Have you ever tried to rinse that
stuff out of a console pad? It ain't happening with the cover on. So after
much deliberating, I took the whole pad cover off. I do NOT
recommend this. You can split a pad cover this way.
Regardless, I got it off.

Here is probably the only time you will see a pad cover apart from
its plastic frame and foam. I spent probably 3 hours soaking and
squeezing the Bleche White out of the pad. It simply acted like a
sponge.
You can see from the picture below that the Bleche
White did get most of the red off from the black frame. It did get
some off from the pad cover but not much. I cleaned again with my
brass brush and figured if it wasn't going to come off, I may as well
leave it on and paint over it.

On a positive note, when the pad is separated, it is easier to just spray the underside
black. You don't have to do any taping.

The product I use for black is Eastwood's Underhood Black. It
is Excellent. Satin shiny but not too glossy. It covers and holds up
really well to abuse. It had to have been made with Ford cars in mind. I have sprayed air cleaner snorkels
with Under Hood Black and they match PERFECTLY to NOS air cleaner units.

Next, we need to start putting the console pad back together.
Before I did that though, I hit the underside of the cover with
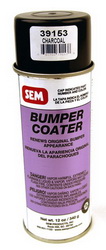
Duplicolor Adhesion Promoter and SEM Charcoal Bumper Cover Coating
39153. Again, I wanted to make the underside of the pad grey so I
wouldn't have to tape it off. I also wanted to see if the rumors
were true...does SEM 39153 match the interior 84-86 Charcoal Grey?
Oh it does. It is an almost EXACT match. It is perhaps the
slightest of shades off. The kind of "off" where you wonder if the
lighting is to blame. It's that close. IF IF IF it dries a
bit flat, use more Adhesion promotor and a VERY light coat of SEM.
The Adhesion promotor's sheen will override the SEM. The best is
to have a hot day, low humidity and then a few good coats of the SEM
dries to a nice satin finish.
I also painted the top of
the dash hull and the dash pad with some Metro Finishes paint I had
restored my ascMcLaren's interior with. The Metro Finishes paint
is a 100% perfect match to the 84-86 Charcoal Interior. When
compared with SEM, like I said, the shades were nearly identical.

Once the cover was back on. We use GOOP! I love GOOP!
It is another amazing product. They make about a hundred versions.
Automotive GOOP, Plumbing GOOP, Craft GOOP, Outdoor GOOP, even RV GOOP!
Guess what? It's ALL THE SAME. I have had 3 different kinds of
Goop, and can NOT tell the difference in the product. Just grab
what ever package is on sale.
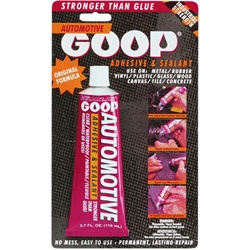
Why is GOOP great?
It is a rubber like glue that glues dissimilar surfaces together quite
well. Like rubber and wood. Or in this case a vinyl cover to
a plastic frame and foam. It remains flexible and dries clear.
If you make a mistake it doesn't affect the material (maybe a little)
and you can pull it all off and start over.
So I take the pad
that's been painted on the bottom and SLATHER the goop around inside
and under the lip of the cover on the underside and then TAPE it up like
the picture below. Pull the tape as hard as you can get it.
Then flip the cover over and place it on a flat surface and leave a book
on it.
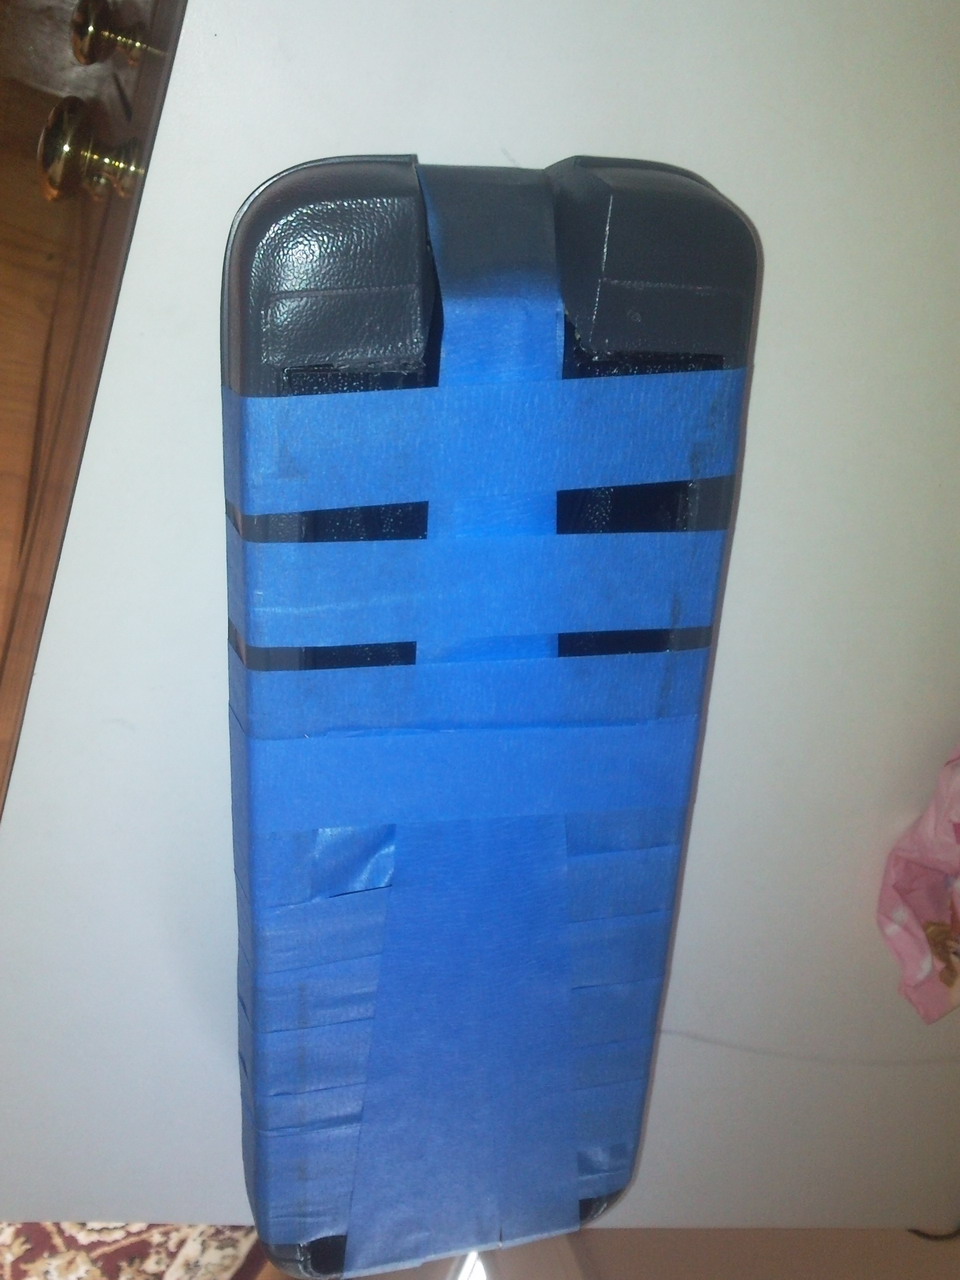
In 24 hours you have an underside that looks like this:
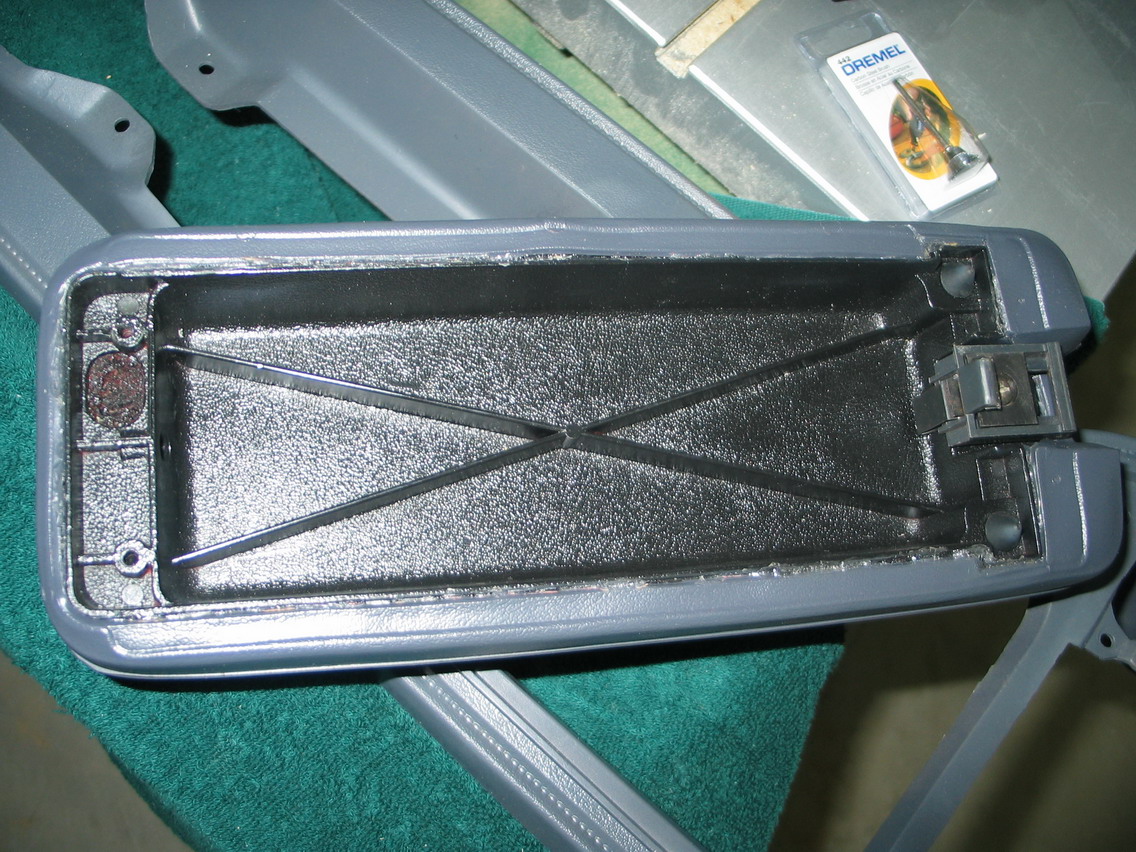
All the edges are nicely glued in place. AND if you have a
cracked plastic frame (most are), by glueing the pad cover in securely,
that crack will all but disappear. It's barely noticeable.
This pad had only a small crack starting on the side. After this
it should never get worse.
So I sourced some console pad bumpers
from FMR (www.foxmustangrestoration.com).
$3. The trick to these is to put one side in and then using a
phillips head screw driver, push the middle of the bumper towards the
center of the hole.

After:

I also source the latch set from a helpful soul over at FEP (www.foureyedpride.com).
If you need parts head to the classified section of their message board
and just ask. The latch comes as 3 pieces (4 if you include the
screw). You need the latch body, the metal spring and the plastic
"block".

Below is a picture of the completed pad. All together.
And finally the finished pad painted and set on top of the console.
This is a final picture of the console. The console hull was
painted with Metro Finishes paint. Can you see a difference
between the SEM paint and Metro Finishes?:

In Conclusion:
Do NOT try to strip the paint off from a pad by soaking it.
Just use liberal amounts off Simple Green and brush hard. I
literally wasted 2 weeks trying to dry the pad out and removing the
Bleche White before just ripping the cover off.
SEM Bumper Cover
Coater 39153 is as close to an exact match as you get to 84-86 Charcoal
interior.
Part 4: Crazy Coin Tray
© 2003-2007 Michael Negus All Rights Reserved.
Send Email to:
info@ascmclarencoupe.com
asc McLaren and Fox Bodied Mercury Capri Cars